
I looked at the options and information for each application, and concluded that the Trimble SketchUp application was going to suit us.
Last night, I downloaded the free (non-commercial) version of SketchUp from their website, installing it with no problems on my Windows v.8.1 PC. I watched another of their YouTube instructional videos, and then opened the program to try for myself.
First WHUH?! Is Mine
I fought with the software for a while, not seeing the same options and presentation as the videos. I ran the first two videos again, and saw that, to start with, I had jumped ahead when I selected a template. I had picked the "3D Printing" template as the closest match to what I want to do, not noticing that the videos began with a different template. The "Simple Template" starts with a human figure, with "sky" and "ground" references to make scale and orientation very obvious.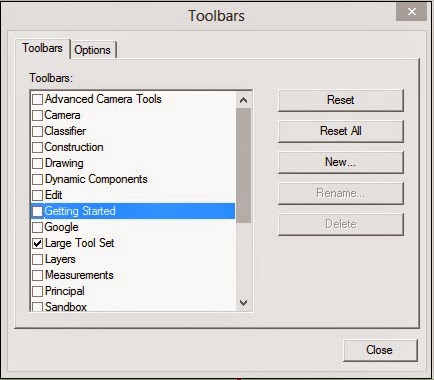 Another issue was that I had missed the instruction in the second video that showed how to open a larger toolset, and this made the program look very different. Once I reviewed the video, I found the location of the toolset selection was the same as the video, but the interface was a little different. No problem, I figured it out fairly quickly.
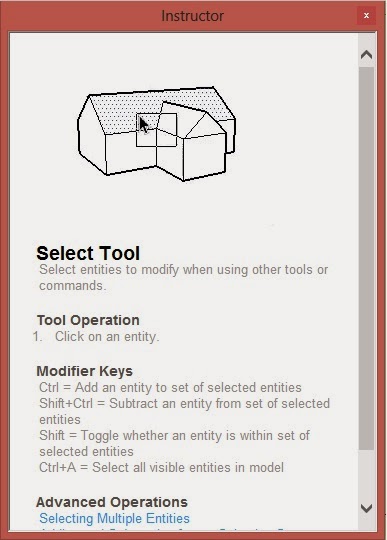 I really liked the hand-holding inset window, called The Instructor, which launches automatically with the program. It shows with a little animation the basic use of whatever tool is currently selected, and offers step-by-step use instructions, as well as some advanced information via links. Clicking an advanced link opens a new window so you don't lose the basic Instructor. If you close the Instructor inset and then want it back, a typical Help icon opens it from the lower toolbar.
A certain "touchiness" about shifting and moving elements in the drawing felt like a program problem, but is more likely just my position at the left end of the learning curve!
Ready-Made Objects
The Trimble site offers a warehouse of millions of already-defined objects—although most seem to be buildings, landscape designs and other objects not appropriate for printing from the Bukito (whose dimensions have a 5x6x5-inch limit). However, when I search for "planetary gear", I get a list of 22 objects tagged with that label.Deleting the five accidental matches (Assault Shuttle, Gear motor, L-1 Gunship, Circular saw motor, and Star Frontiers UPI Explorer), I have 17 possible good starting points for my printing efforts.
Biting the Bullet
My spouse was kind enough to offer use of the older PC (usually reserved for spousely networking and writing) as a destination to download the Bukito driver software. So having spent enough time in the diversion of 3D-modeling software, and having located a source for an object to test-print, it's time to get the printer actually printing.Next step, acquiring the Arduino and Teensyduino drivers.
No comments:
Post a Comment